Authentication
Authentication in ComposeFlow
Integrating authentication into your ComposeFlow app allows you to manage user access and personalize user experiences. ComposeFlow leverages Firebase Authentication to provide secure and easy-to-implement authentication methods.
Prerequisites
Before you begin, ensure the following steps are completed:
-
Firebase Integration: Your ComposeFlow project is connected to Firebase. If not, follow the Firebase Setup Guide to integrate Firebase with your ComposeFlow project.
-
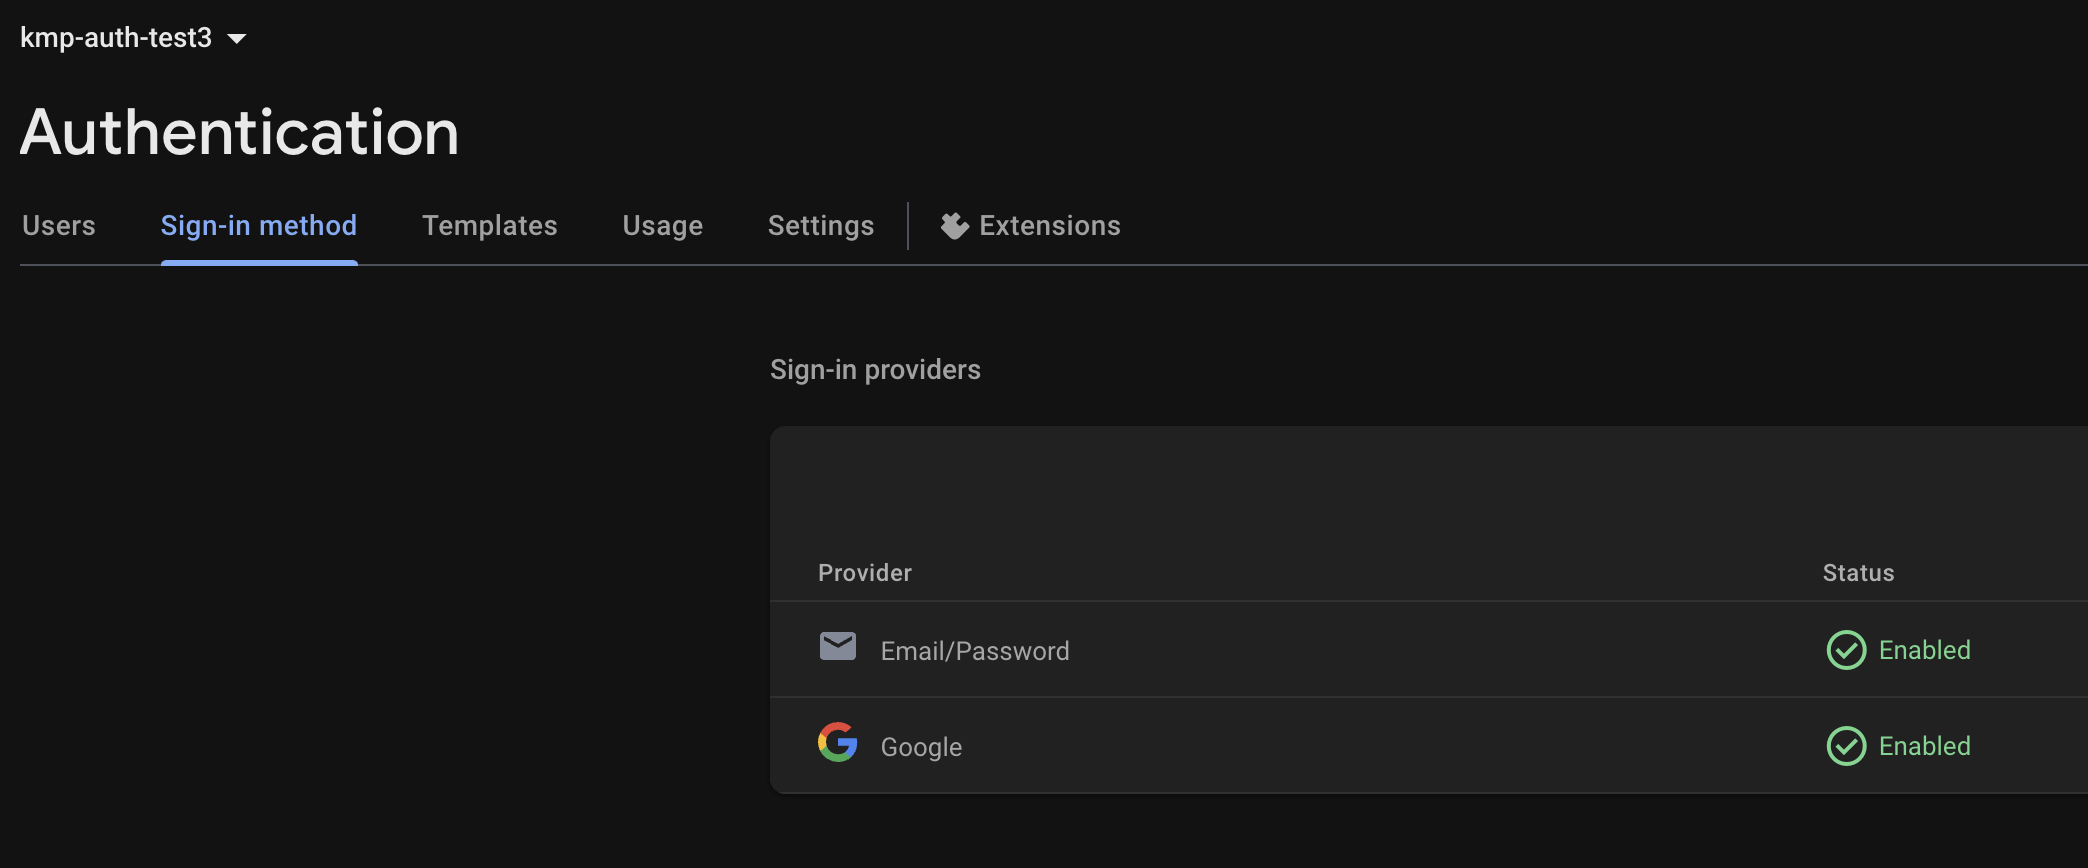
Enable Authentication Providers:
- Navigate to the Firebase Console for your project.
- Go to Authentication > Sign-in method.
- Enable the authentication providers you wish to use (e.g., Email/Password, Google, Facebook).
- Configure any required settings for each provider.
Enabling Authentication in ComposeFlow
Once Firebase Authentication is enabled and configured, ComposeFlow automatically provides access to user authentication features:
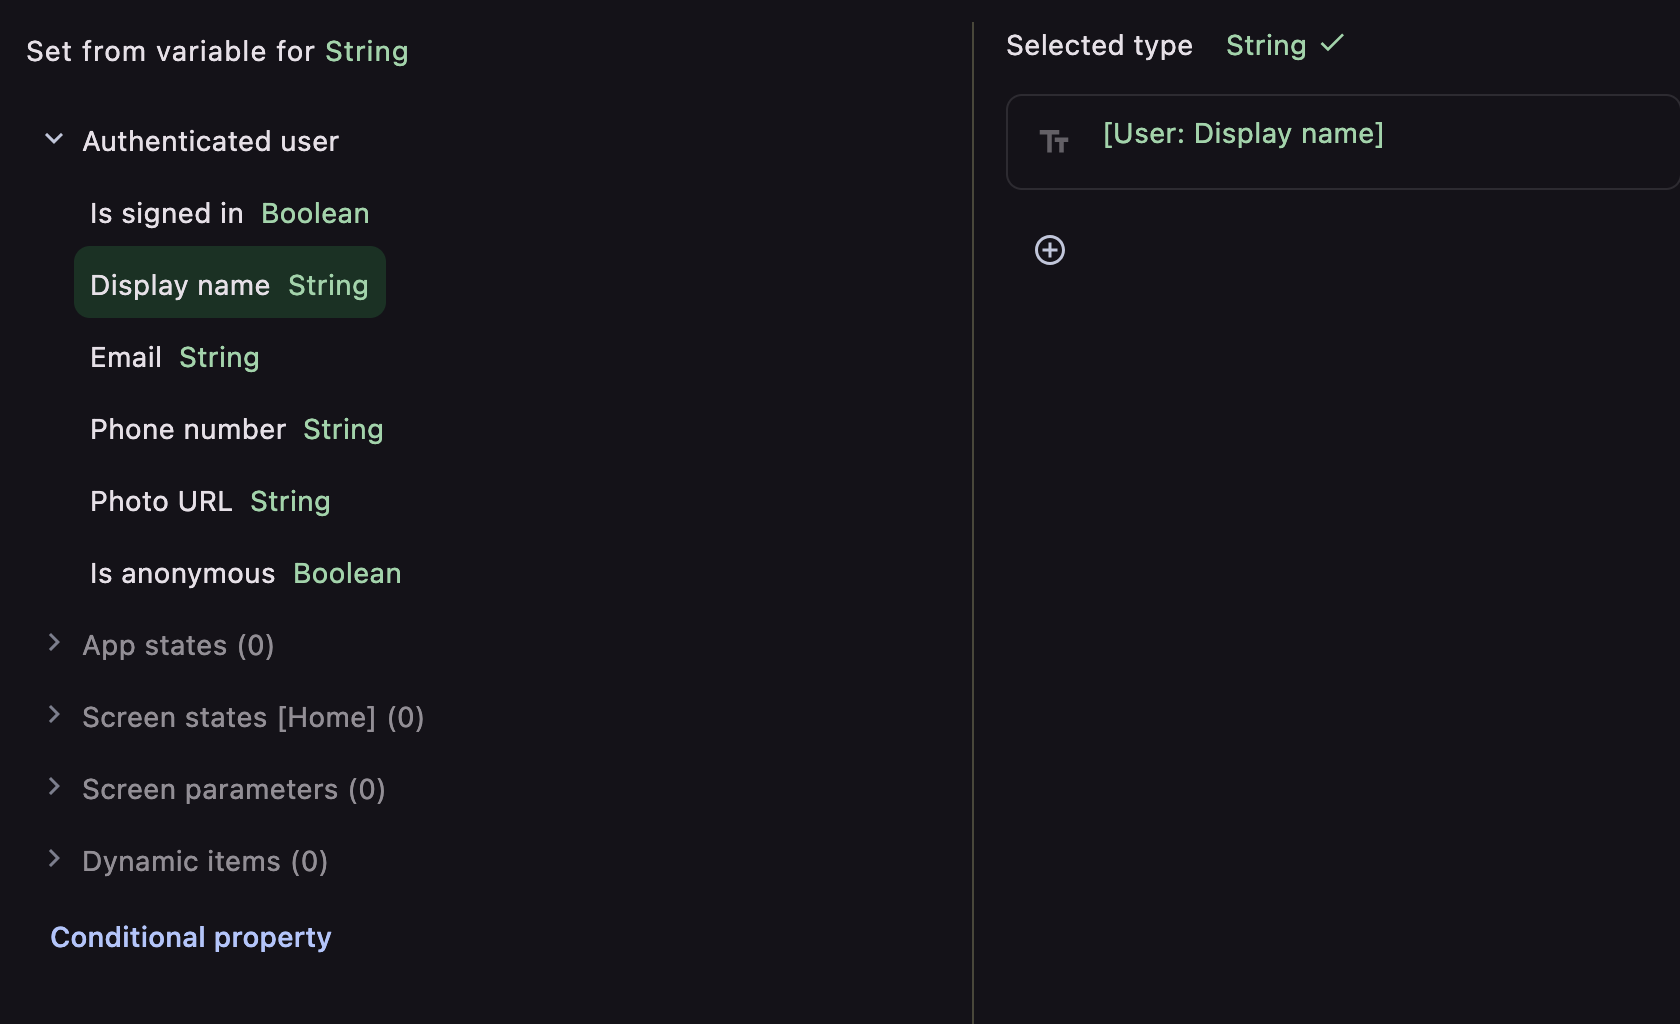
- User Properties as States: Signed-in user properties such as email, display name, and user ID become available as states within your app. You can use these states to personalize content or manage user sessions.
-
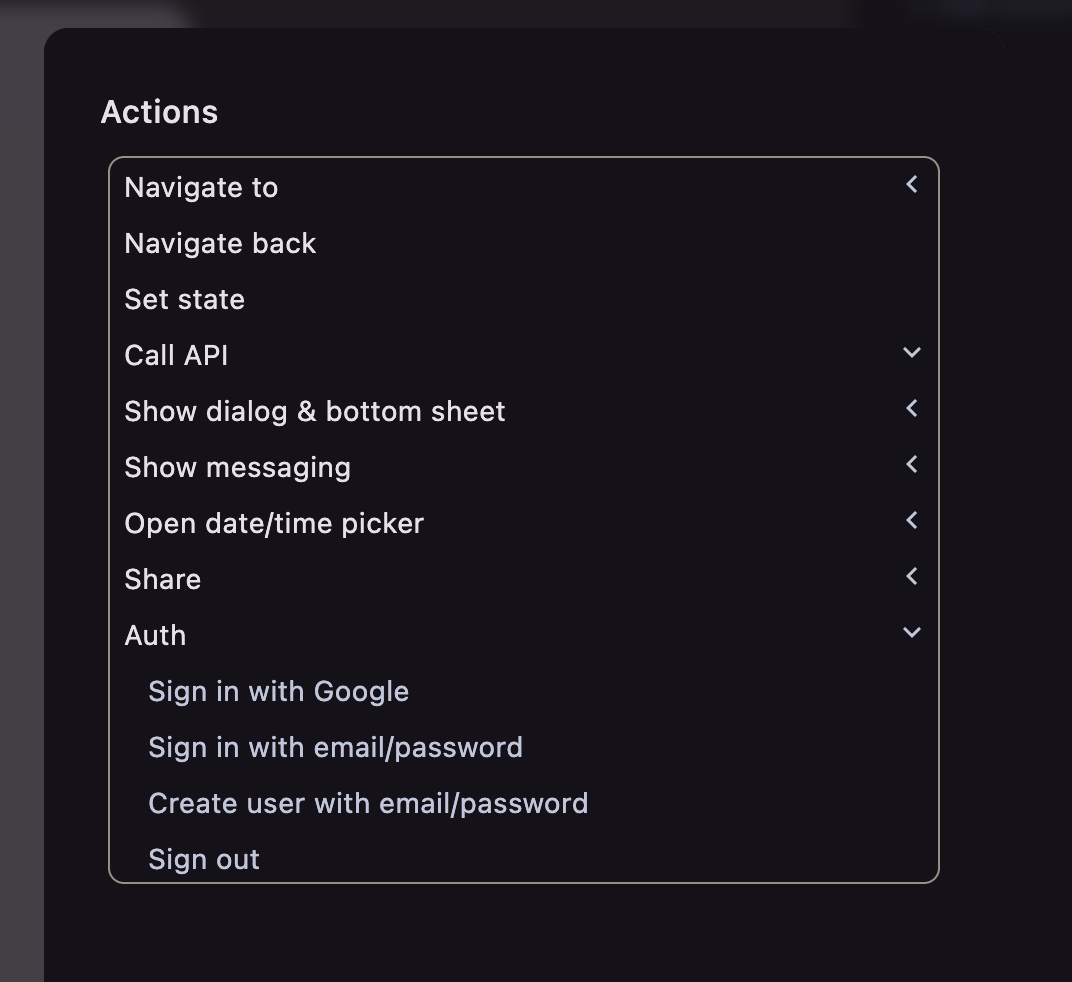
Authentication Actions: A set of authentication-related actions becomes available, including:
- Sign in with email/password
- Sign in with Google
- Crate user with email/password
- Sign Out User
Using the Login Screen Template
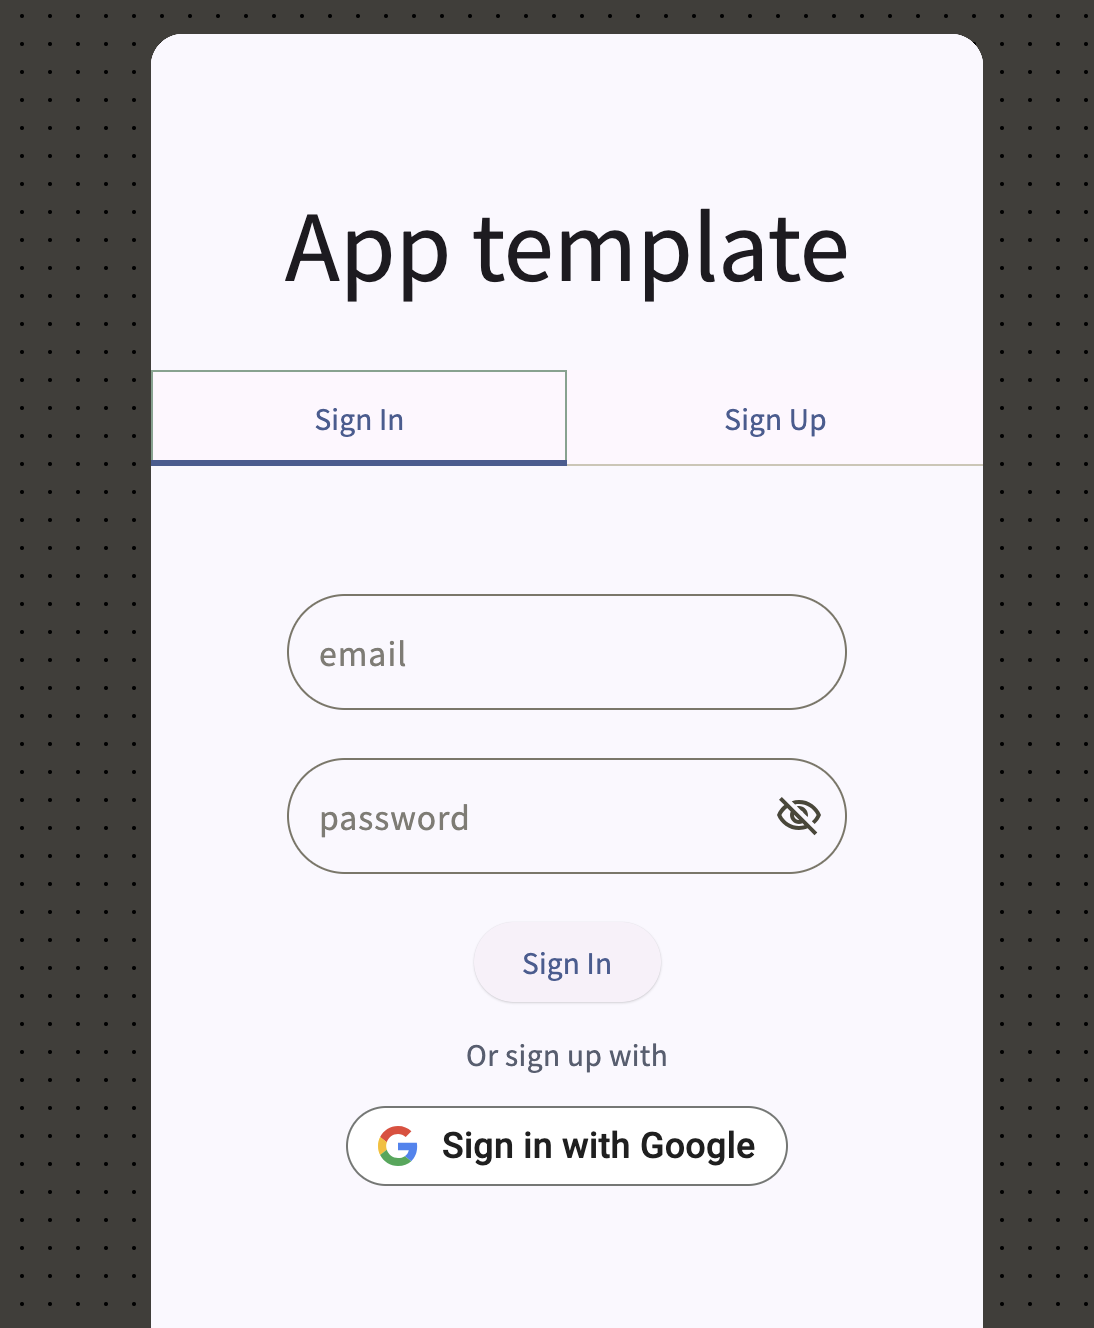
ComposeFlow offers a Login Screen template that simplifies the process of setting up user authentication.
Step 1: Add the Login Screen Template
-
Add a New Screen:
- Go to Screens in the Project Explorer.
- Click ”+” to add a new screen.
- Choose “Login Screen” from the list of templates.
- Name the screen (such as “LoginScreen”).
-
Review the Pre-built Design:
- The template includes the necessary UI elements such as Email and Password fields, Login button, and options for third-party sign-in providers if enabled.
- Authentication actions are already assigned to the appropriate triggers.
Step 2: Customize the Login Screen
-
Modify UI Elements:
- Adjust the design to match your app’s theme.
- Add or remove fields as necessary.
-
Check Assigned Actions:
- Select the Login button.
- In the Inspector panel, verify that the
onClicktrigger has the “Sign in with Email/Password” action assigned.
-
Configure Third-Party Sign-In (Optional):
- If you have enabled providers like Google Sign-In, ensure the corresponding buttons have the “Sign in with Google” action assigned.
Setting the Initial Screen
ComposeFlow allows you to set the initial screen of your app based on the user’s authentication status.
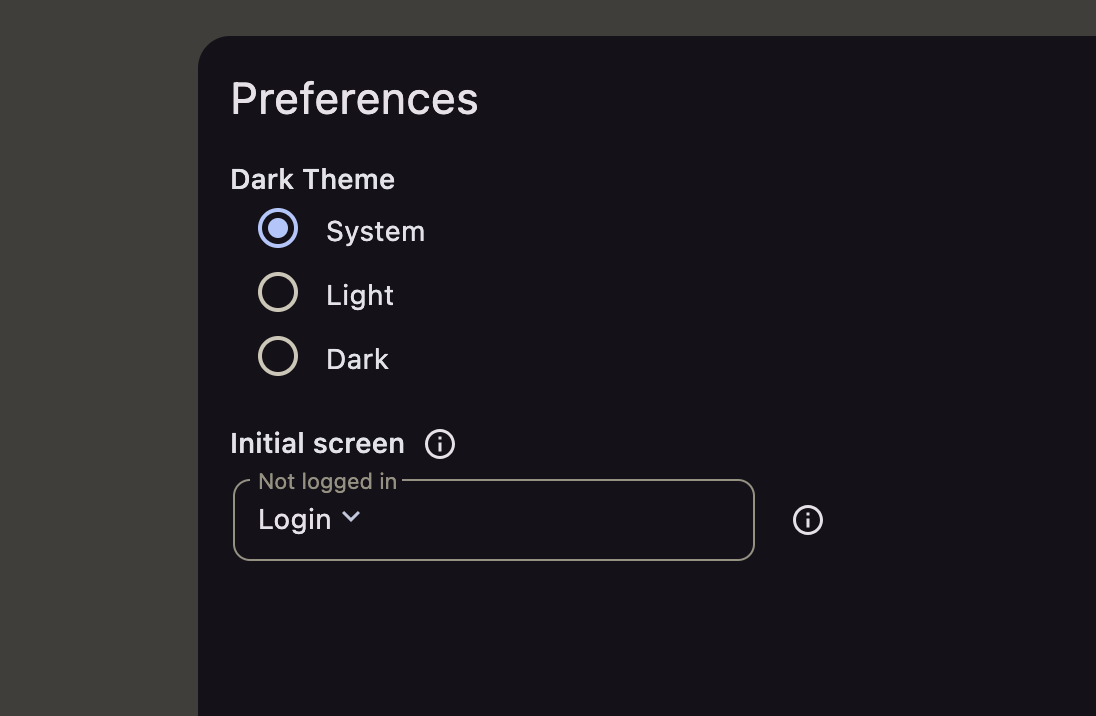
Step 1: Navigate to Preferences
- In ComposeFlow, go to Settings > Preferences.
Step 2: Configure the Initial Screen
-
Initial Screen Dropdown:
- Locate the “Initial Screen” setting.
- Here you can specify which screen should be displayed when the app launches.
-
Set Conditional Navigation:
- Choose “LoginScreen” as the initial screen for users who are not signed in.
Implementing Authentication Actions Manually
If you prefer to build your authentication flow from scratch, you can manually assign authentication actions.
Step 1: Design the Authentication UI
-
Create a Custom Login Screen:
- Add a new screen and design your own layout with TextField composables for email and password, and a Button for login.
Step 2: Assign Authentication Actions
-
Select the Login Button:
- Click on the Login button on your canvas.
-
Add Sign-In Action:
- In the Inspector panel, under Events, find the
onClicktrigger. - Click “Add Action” and select “Sign in with Email/Password”.
- In the Inspector panel, under Events, find the
-
Configure the Action:
- Email Field: Bind the action to the email input field.
- Password Field: Bind the action to the password input field.
Additional Authentication Features
Sign Out
-
Implement a Sign-Out Button:
- Add a Button for signing out.
- Assign the “Sign Out User” action to the
onClicktrigger.
Third-Party Sign-In
-
Enable Social Login:
- Add buttons for providers like Google or Facebook.
- Assign actions like “Sign in with Google” to the
onClicktriggers.